Ask almost any homesteader in our Roadside Roundups which item sells out the fastest, and the answer is nearly always the same: pasture-raised chicken and duck eggs.
When your neighbors fall in love with rich, orange-yolk farm eggs, demand quickly outpaces what a backyard flock of 15 or 30 hens can lay in a day—especially when daylight hours shorten in the fall or hens go through their annual molt. Trying to keep track of who texted you first for the next available two dozen quickly turns into a tangled notebook of sticky notes and forgotten DMs.
That's why roadside.market built a dedicated Waitlist Queue mode right into our Storefront Schedules.
How the Waitlist Queue Works
Unlike a Weekly Bake Drop that promises a specific Saturday pickup time, a Waitlist Queue has no fixed calendar date:
- Chronological Line: Customers select your Waitlist schedule on your storefront, pick how many cartons they'd like, and submit their order to join the queue.
- Pay on Pickup (Waitlist Offset): Because exact fulfillment timing depends on your hens or harvest, the cart automatically marks Waitlist totals as Pay on Delivery (Waitlist) so neither you nor the buyer has to worry about expiring card authorizations.
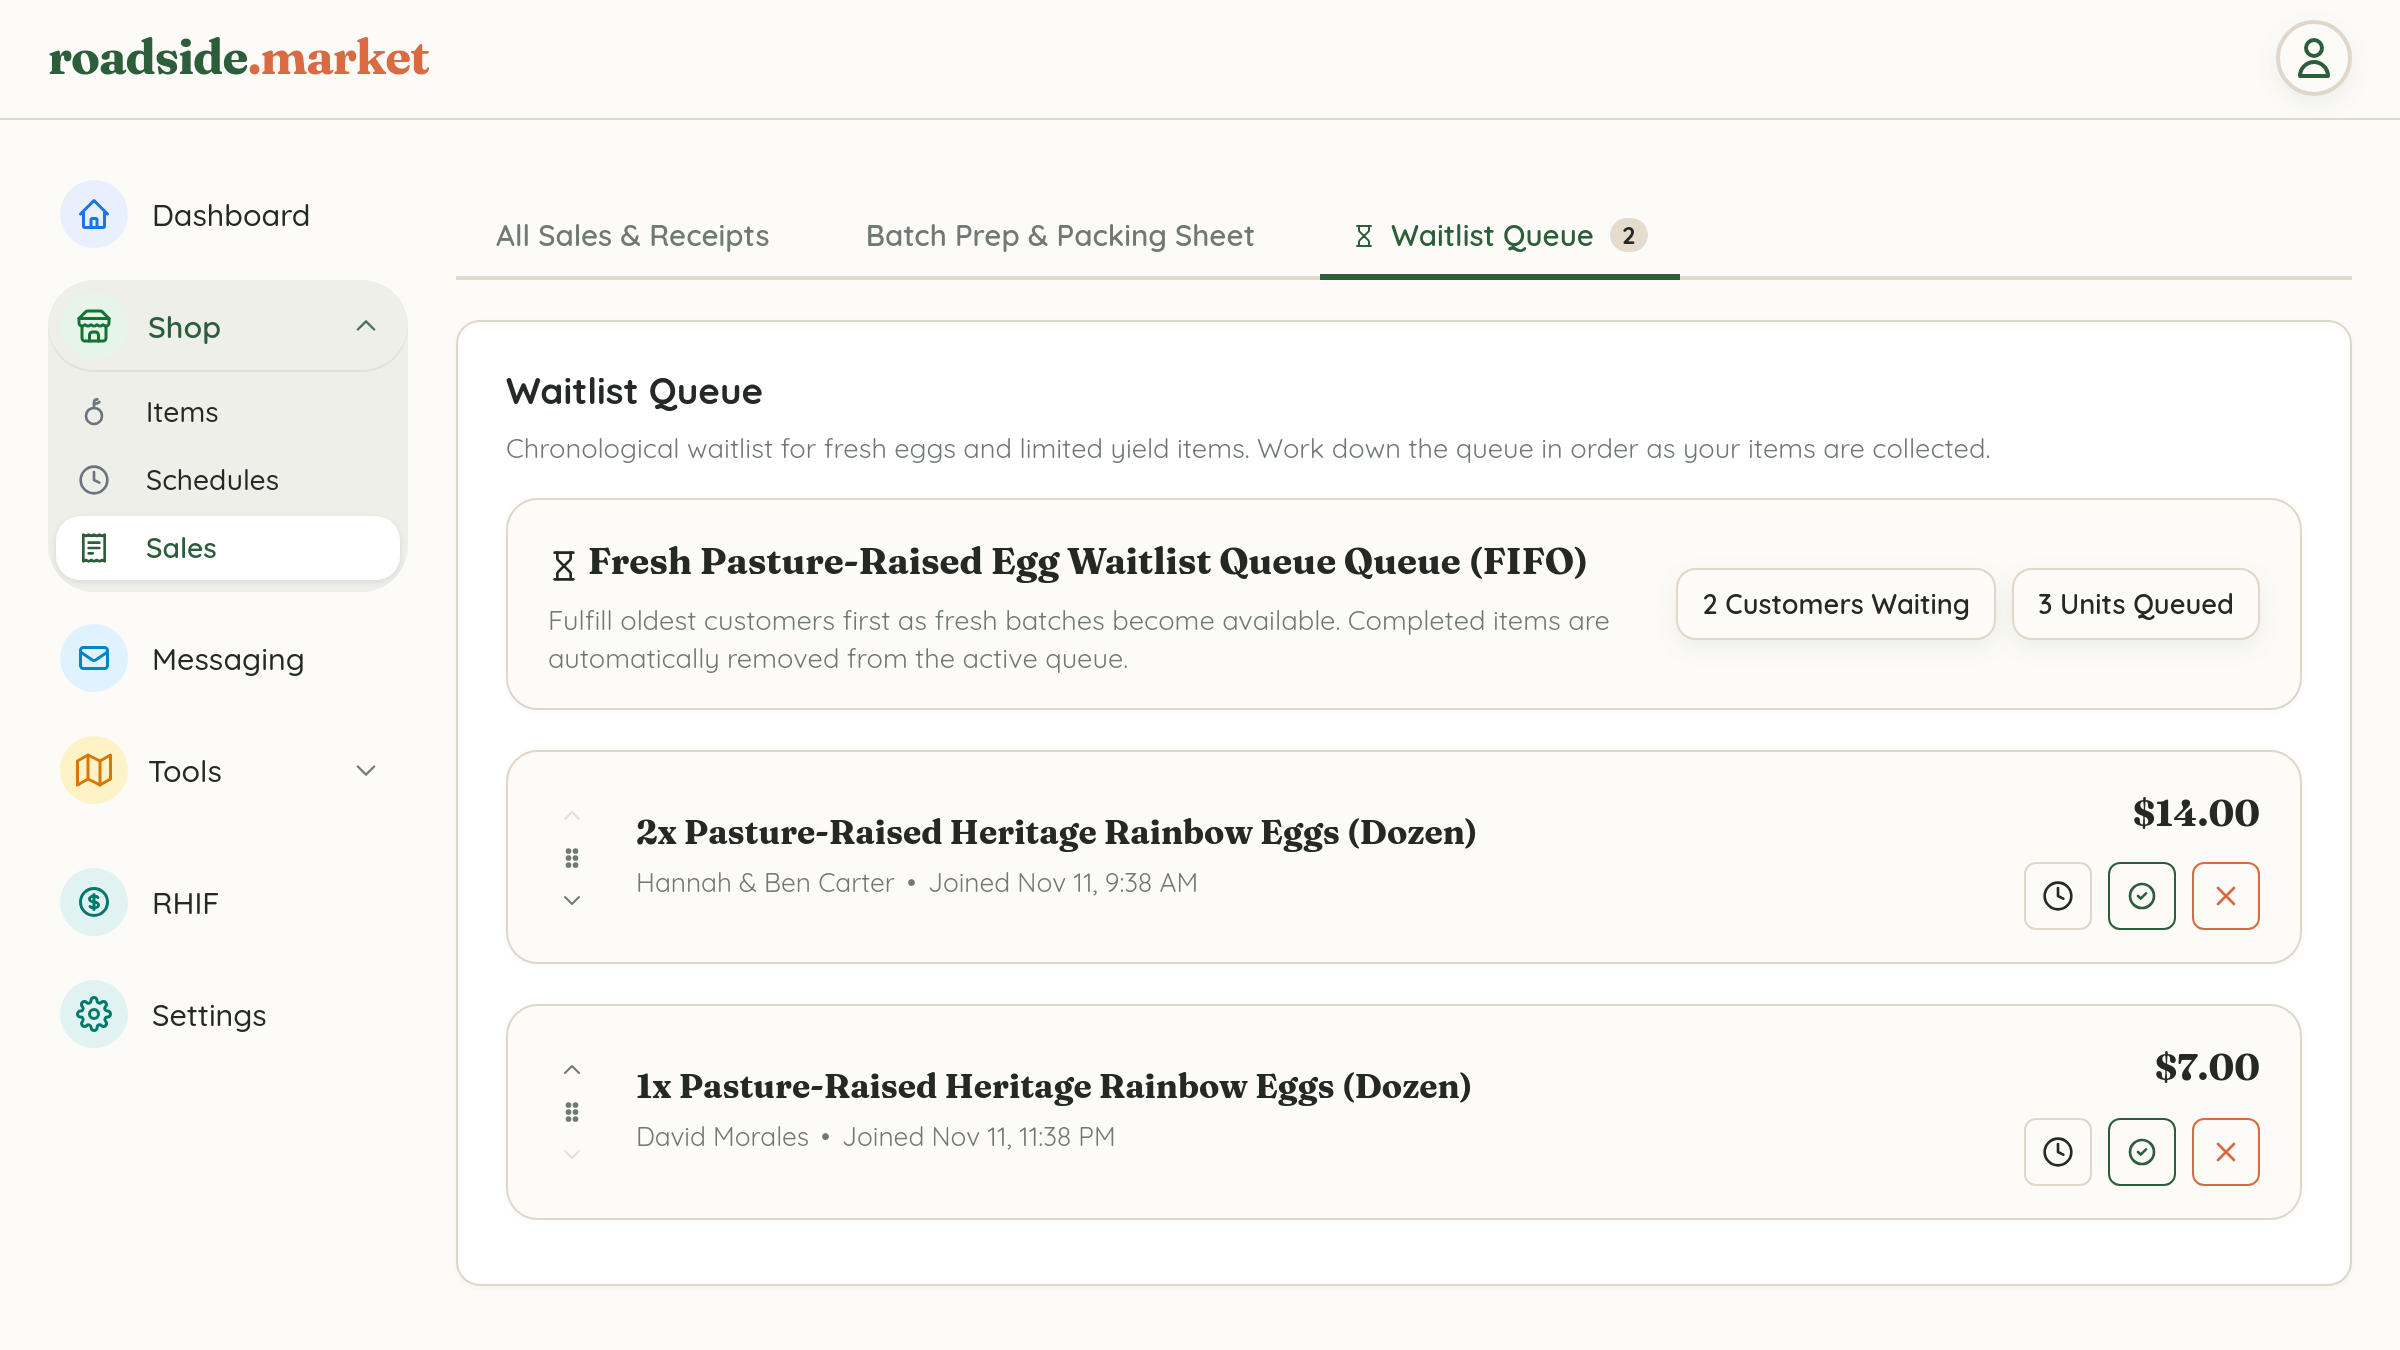
- Work Down the Queue Fairly: As you collect and wash fresh dozens each afternoon, you simply open your queue, see who is next in line, and mark their order ready for pickup!
Step-by-Step: Setting Up Your Egg Waitlist

- In your Business Manager, make sure your Chicken Eggs, Duck Eggs, or Quail Eggs are added under Shop → Items.
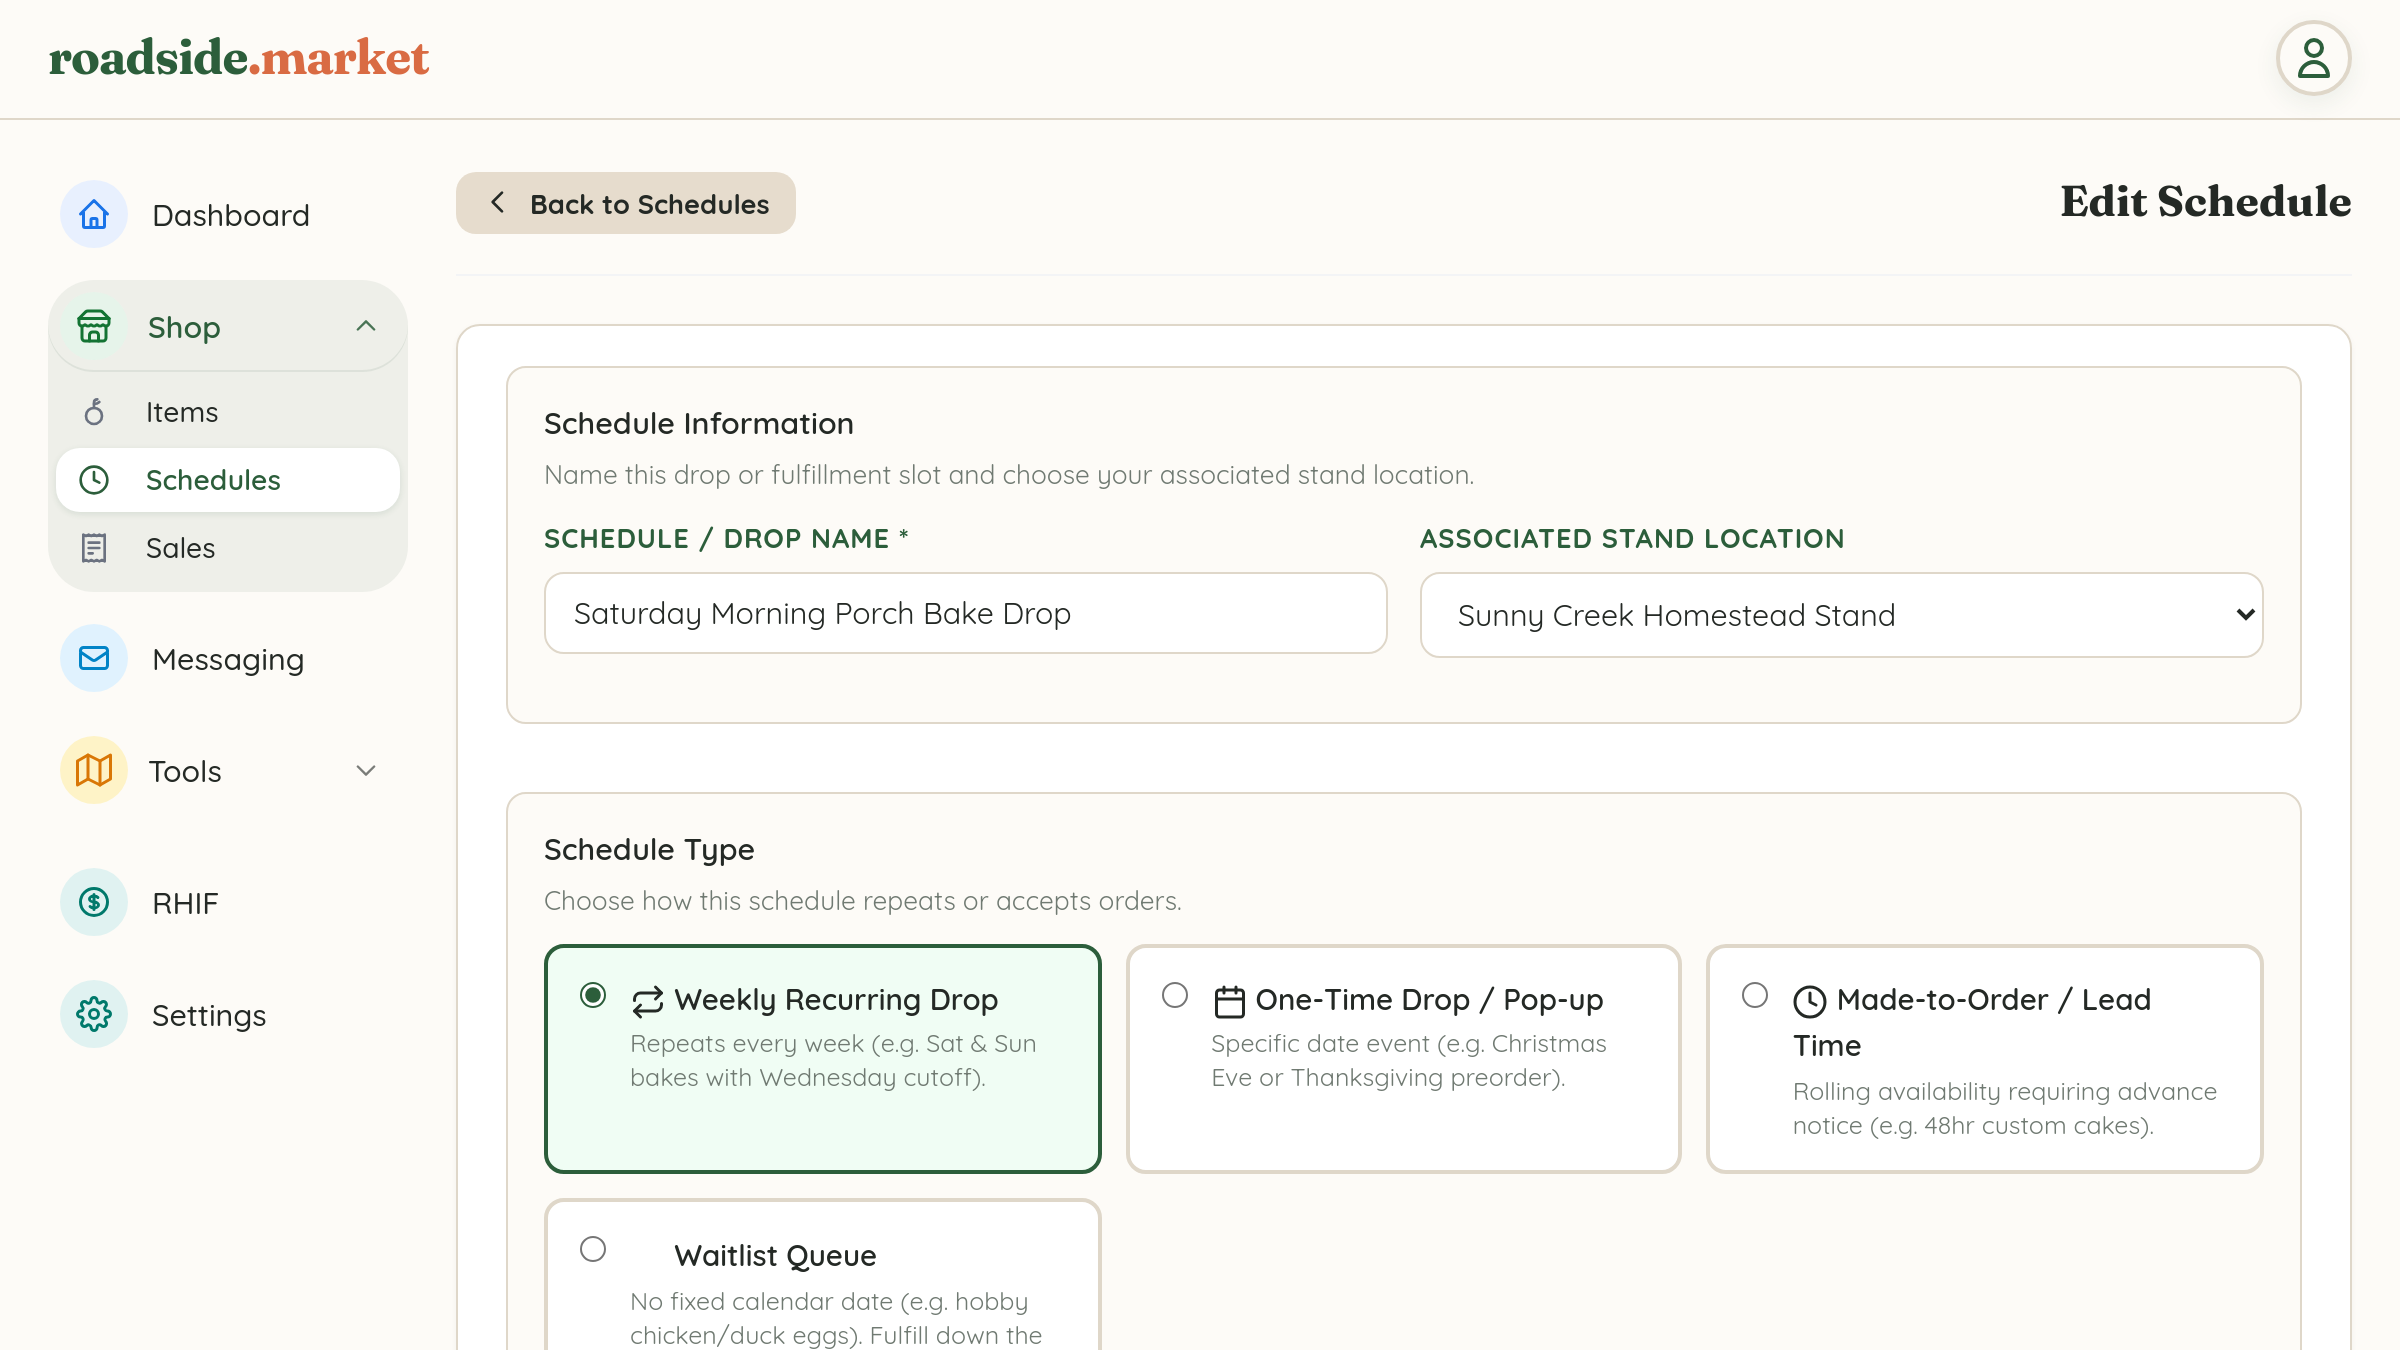
- Navigate to Shop → Schedules and click + Add Schedule.
- Name your schedule (for example, "Fresh Egg Waitlist (Fulfilled in Order)").
- Under Schedule Type, select the fourth card: Waitlist Queue.
- Check your egg products under Products Offered in this Drop, add your pickup instructions (e.g., "We'll text/message you when your cartons are in the stand fridge with your name on them!"), and click Save Schedule.
Managing Your Queue in the Sales Panel
Whenever you have fresh cartons ready to allocate, head to Business Manager → Shop → Sales and click the Waitlist Queue subtab (which shows a live badge count of waiting orders). You'll see a clean, chronological list of every neighbor waiting in line so you can fulfill orders from top to bottom with zero guesswork.